We’re talking about science communication and motivations for scientists to reach a broader audience. By a broader audience, I’m talking about scientists outside your field, resource managers (who are often biologists, but do not typically read the scientific literature), students (K-12, undergraduate, graduate), the media, policy-makers, and the general public. In the last post, I explained how a proven record of communicating science to a diverse audience is essential to meeting funding agency requirements (e.g., the Broader Impacts criterion required for proposals to the National Science Foundation).
In this post, I’d like to provide another incentive: getting more citations and recognition.
Most scientists are evaluated based on their publications and more specifically on the numbers of citations their publications receive. One can argue that such indices are flawed and are not a good way to judge someone but the fact is that search committees and promotion review panels routinely examine the citation record and h-index of candidates. If you have published a number of papers but they’ve not been cited (except by you and other co-authors), then the conclusion will be that your work is not making an impact on the field. On the other hand, if your papers have been cited hundreds of times by scientists working in diverse fields, then your work is clearly of general importance to science. Guess which outcome is going to put you at the top of the list of candidates or ensure your promotion?
This type of information can be acquired by examining the citation record, typically in the Thompson Reuters Science Citation Index (available online through the Web of Science). Another growing data source for citation analysis is Google Scholar (in case you haven’t checked this out, GS citations does an excellent job of accurately compiling your citations). The h-index is a measure of both number of publications and number of citations. The h in the h-index means that a scientist has published h papers, each of which has been cited in other papers at least h times. By the way, if you don’t have a clue about how many times your publications have been cited or what your h-index is, that’s like a student who doesn’t know their GPA (grade point average). Without such information, you will not know how you stack up against your competition or whether you need to step up your game.
Bottom line…citations are important. If people are unaware of your work, they won’t be citing it. The more students and scientists in other fields who have heard of your research, the more citations you will get. This is where science communication comes in. A graduate student, for example, may be writing their first paper or research prospectus about a very specific topic but is looking for more general information to set the background for the study. They will do a typical literature search but will likely also search on Google, especially if they cannot find a scholarly paper that provides the type of basic information they need to put their work into a broader context. Such information was only available in books when I was a graduate student, and I had to trek to the library and search the stacks for a good basic description of a habitat or a species, which simply was not available in single research articles (and even if it was, it was not written in everyday language that I could comprehend). Nowadays, this type of basic information is everywhere on the internet, and students, in particular, are likely to search for it on the Web.
Let’s take a look at an example of how a non-technical communication product about a research effort can lead people to your technical articles, which they then will be more likely to cite in their technical paper.
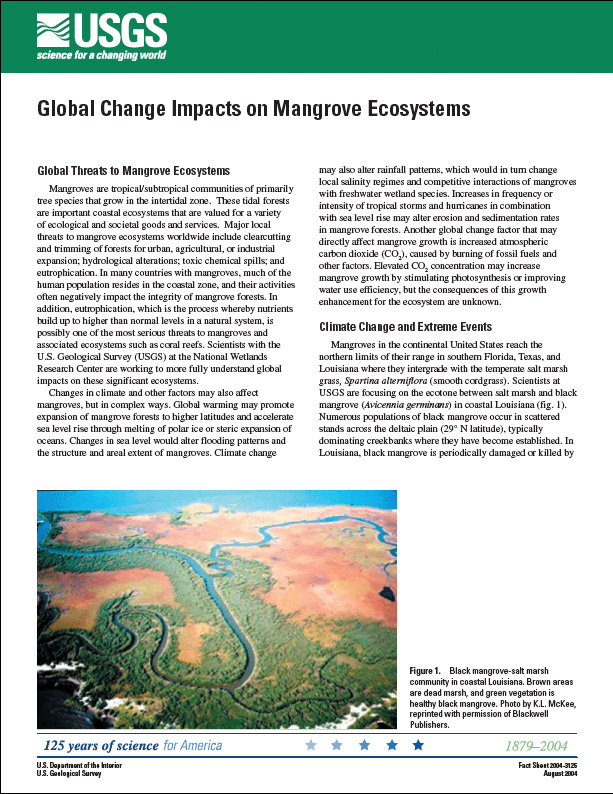
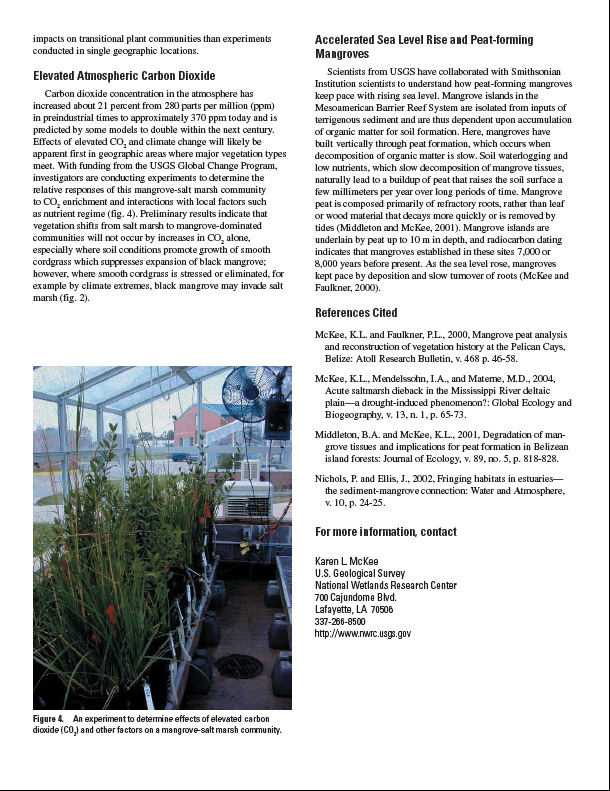
First, I’ll use a text-based communication example. Government agencies routinely produce science communication products geared toward general audiences. The agency I worked for uses “fact sheets” to summarize information about a science topic or a recent research finding….written in everyday language. I wrote several of these fact sheets, which turned out to be much more popular than any of my technical publications. One of these summarized my work on global change impacts on mangroves (a type of coastal wetland). If you conduct a Google search on the terms global change and mangrove, my fact sheet pops up near the top of the list (see screenshot below).
Note that my fact sheet, unlike the scholarly articles listed above it, is available for free. All one has to do is click on the link, and the viewer is taken to a webpage with the entire fact sheet, including a link to download a pdf of the article (see photo below).
 The scholarly articles listed above it on the search page are all good sources of information about mangroves and global change, but you need a subscription to the journal (or pay $35 or more) to read it. Which one do you think students, in particular, will be likely to read first? As for citations, I provide several references to my own peer-reviewed journal articles at the end of the fact sheet as well as a clickable link to my email address so that whoever wishes to get copies of those scholarly articles can easily contact me (see photo below).
Not only will such non-technical articles lead people to your technical papers, but they will generally raise your scientific profile on the internet. In the next posts, I’ll show how videos and other audiovisual items will make you visible when your text-based links will not.


