Or watch a video showing how it’s done? In previous posts, I’ve talked about how time-lapse videos are compelling and also how to make them with your Smartphone. There are so many phenomena that cannot be appreciated except with time-lapse techniques. Here are two more examples of time-lapse movies, which are not only fun to watch but also contribute to a better understanding of the processes being filmed.
The first shows a crab molting. Apparently, it takes a few days for the entire process, which makes it a good candidate for the time-lapse approach.
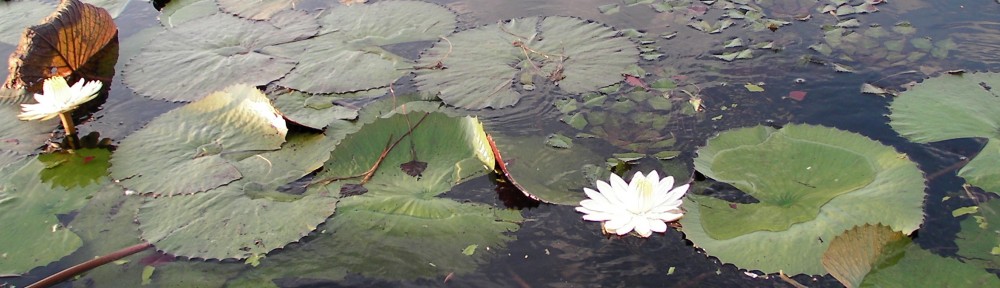
The second video is of the patterns that sand bubbler crabs make. I really like this one. I’ve seen these patterns along sandy shorelines and knew they were caused by a burrowing organism, but the process is so slow that the casual observer rarely takes notice. I particularly like how the video creator has compiled a variety of views shot from different perspectives of the process.
Previously, I described how time-lapse films can be very useful to illustrate certain biological or physical processes that occur too slowly to be viewed in real time. I provided a few examples of time-lapse videos as well as a tutorial of how to create one using a series of still images captured with a camera and by editing them in a movie-editing program such as iMovie.
In this post, I want to point you to an app for mobile devices (Smartphone, Tablet) called Lapse It Pro. It can be purchased in the App Store for $1.99. You can try it out by downloading the free version (which lacks some key features, such as high resolution selection). To make this work with a Smartphone, you also need some accessories to ensure a stable platform.
In the following tutorial, I provide instructions for setting up your phone and how to use the app to capture a time-lapse series of images. The app settings allow you to easily change the frame capture rate (for example, one frame every minute). The free app will only capture images at 480 p. If you have the pro version of the app, your phone can be set to capture high resolution images (720 or 1080 p, depending on your mobile device version).
Note: This article provides basic information about how time-lapse videos are created and includes a tutorial (at end of post) showing how to use still images (taken with any camera) to make a time-lapse video with iMovie. If you are looking for detailed instructions for producing a time-lapse video with a GoPro (and GoPro Studio), see this article and video tutorial: Time Lapse Tutorial for the GoPro Hero 3+. Another video tutorial shows how to use a montage of still images instead of video footage to make a video: How to Make a Video without Film Footage: Montage Revisited.
Time-lapse photography is a technique whereby a scene in real time is sped up to play in a much shorter time-frame. An example might be a shoreline experiencing a tidal cycle in which the tide rises and falls, covering and exposing a mudflat, over a 24 hour period. A film of such a scene in real time would be too long to watch, and it would be difficult for a viewer to see the gradual changes in the water level. Instead, if the scene were sped up to play in a shorter time period, the change would be obvious. Hours of change would be compressed into a few minutes, i.e., lapsing time.
The time-lapse technique is particularly useful for displaying biological, chemical, and/or physical processes that are naturally too slow for the human eye to see in real time: a seed germinating, a flower unfolding, a caterpillar transforming into a butterfly, colors changing seasonally in a deciduous tree, a glacier melting, a shoreline eroding, storm clouds gathering, and many other events that take hours, days, or weeks to unfold. If you wish to study or display such changes on film, you must know how to create a time-lapse film.
Below is an example of a time-lapse of decaying fruit.
To begin to understand how to capture and edit a time-lapse film, let’s analyze how the above film was created. A single photo was taken (from exactly the same position) of a bowl of fruit every 40 minutes for 74 days. This means that 36 photos were taken per day, and 2664 photos in all would be captured. If each photo represents a 1-sec frame in a film and all 2664 photos were played at 30 fps (frames per second), then the final length of the film would be 1.48 minutes (the actual length of the film was 1.37 min, perhaps because the frame duration was set to slightly less than 1 sec or not all photos were used).
Note that you can also create a time-lapse film by speeding up a video clip; however, this approach is usually limited to short-duration events (e.g., an hour) that can be filmed and later sped up to play in a few seconds. You can also splice together film clips shot at brief intervals throughout an event and then time-compress during editing by shortening the duration of the final film. In the video below, a decaying pig carcass was filmed at the bottom of the ocean over a 9 day period; the film appears to have been created by splicing together short film clips captured each day.
However, the creation of a time-lapse film with still images is the most common (and easiest) approach. To create a good time-lapse film, there are a few important points to keep in mind:
1. Use a tripod to ensure that all photos are taken from exactly the same position/angle. Otherwise, the resultant film will not be smooth.
2. Shoot the photos in manual mode; otherwise, the camera will try to automatically adjust for changes in light levels, etc.
3. Carefully calculate the time interval needed between photos. This calculation will depend on the process being filmed, how fast the changes occur, and how smooth you want the resultant film to be. The more photos per unit time, the smoother the result (if you want to create a jerky effect, then scale back). If you are shooting cloud movement, you might take one photo per minute. If you are filming something that unfolds over days or weeks, then you might take only one photo per day. For example, filming one year in the life of a tree might require only one photo per day (365 photos in all). If each photo is played for 2 sec at 30 fps, the resultant film would be 24.33 sec in length.
4. Be sure you have sufficient battery life and memory to accommodate all the photos. Use jpg and adjust the size so that you get optimum quality without running out of memory.
5. Before you launch into your project, do some test shots to make sure everything is set up correctly and you are getting what you need. It’s a good idea to take a few photos and edit them to get an idea of how the final version will look and to spot any problems.
In the tutorial below, I show how to turn a series of still images into a time-lapse video using iMovie (direct link to video on YouTube).
I used a point and shoot camera to take the photos manually, but you can use any still camera and purchase hardware and software that will automate the shooting for you. Also, you can even shoot time-lapse photos with your iPhone; there are apps that will help you do this (note: I’ve not tried all of these, so can’t attest to their quality or ease of use):
Lapse It Pro will record photos and render the time-lapse film (this is the app that I use–see this post in which I test it out)
iTimelapse will take the photos and assist in rendering the final film (note: some customer complaints).
Gorillacam will only do the shooting; you have to do the video rendering yourself (note: some customer complaints).
Are you interested in learning more techniques like this? If so, you may be interested in my ebook, The Scientist Videographer, which is an electronic guidebook packed with information, tips, and tutorials and designed for the 21st century scientist, teacher, and student. Available in iTunes Store (fully interactive version for iPad, iPhone, & Mac), Smashwords (text version), and Amazon Kindle (text version).
What happens when you put a pig carcass at the bottom of the ocean? If you’ve ever wondered, check out this video created by Jackson Chu. As you may know, pigs are used in forensic research as models for humans and in this study are helping scientists understand what happens to bodies that end up in the ocean. The video is a time-lapse of the consumption and decay of the pig over several days.
The video by Chu is mainly the raw footage with a minimal text description marking the passage of time. With a little effort, it could have been turned into a really nice video explaining the process of decay and how the work will aid criminologists.
A time-lapse also can be created with graphics, as in this next video showing all 2,053 nuclear explosions since 1945 on a world map:
Not all time-lapse deals with destruction, death and decay. Here is one that shows the changes of a single oak tree over the course of a year:
One of the most entertaining types of science video involves time-lapse. If you study a process that lends itself to time-lapse photography, you might want to consider using this approach for one of your videos. Besides providing important information about change, it makes for fascinating viewing.