What Is “B-roll” and Why Should I Care About It?

Put simply, B-roll is the extra footage you need to shoot to support or augment what your subjects (or you) are talking about in the “A-roll”.  The idea is that you will be shooting primary (A-roll) footage of interviews, a laboratory method, or a field site.  However, you will need additional material to illustrate aspects of this primary footage.  This is the B-roll.  For you digital generation folks, a “roll” refers to the old type of photographic film that was wound around a spool.  The term has an interesting history, which you can read about here.

I routinely shoot a variety of secondary footage when I go out to capture my primary footage. These include both video and still images as well as sound effects that might come in handy during editing.  I always try to get footage of traveling to and from a field site, for example, to use during the title sequence and the credit sequence at the end of the video. Sometimes these clips are shot from a car, a boat, or a plane, and I try to frame the shot so that there is space for the text that I will insert during editing. Here’s a clip that illustrates what I mean:

I shot that footage during the airboat ride to and from the field site where I did interviews and captured other primary footage. I used those clips for both title and end sequence, which worked out well, I think.  The entire video can be seen here.

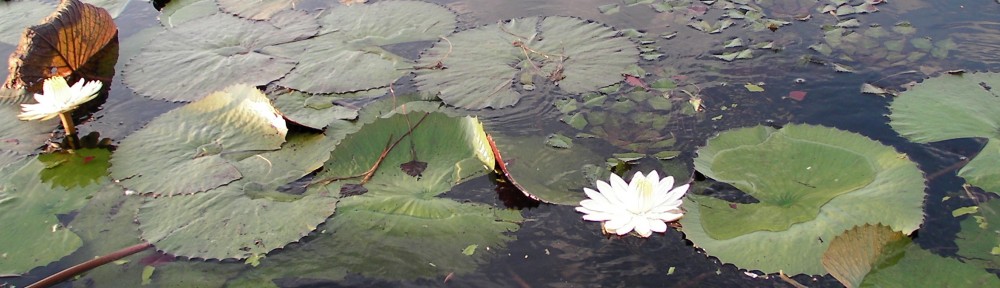
I usually spend some time at the location of the shoot filming various closeups of plants and animals as well as landscapes, waves breaking on the shoreline, rain, vehicles moving past, people, buildings, shadows, or whatever characterizes the location.  I additionally shoot still images, especially closeups of flowers, insects, or other items that I can use in a montage of scenes.  Once I’ve completed the interview, then I walk around and shoot video or still images of whatever the interview subject has mentioned.  Then, I can insert those images during editing so that a long interview is not just of a talking head, but has interesting images or clips interspersed with the interview footage. Here is an example from the same video as above:

If you are doing a video of a laboratory method, you will want to get various shots of equipment from different angles as well as people going about their work.  You will probably work out a lot of these shots beforehand, but it’s always a good idea to shoot extra scenes and even things that are not central to the subject.  These types of footage may turn out to be useful during the introduction to the video or as a transition between interviews.

I also capture sound effects that might be useful for a montage of still images, for example: sounds of dripping water, waves breaking, birds or crickets chirping, a crackling fire, lions roaring (got this sound effect on a trip to Botswana).

During my work as a researcher, I got into the habit of setting aside time during a field trip to take photographs for later use in presentations and journal articles. I would first make a list of items that I needed a photo of, and then go out and search for them.  Sometimes, I would spend an entire day (during a long field trip) just shooting photos.  So it was second nature for me to apply the same practice to shooting video.

Get into the habit of taking your camcorder or camera with you and shoot whatever you are doing–in the lab or in the field.  Believe me, it will be worth the time and effort when you sit down to edit your video.

The Dramatic Question and How It Applies to Science Videography

In film making, the dramatic question is what drives the story.  Will the good guy win? Will the boy get the girl? How will the journey end? Once the dramatic question is answered, the movie is over.

In science videos, we often fail to identify, much less answer, the dramatic question.  We are even stumped at the whole idea of a dramatic question because we are so focused on the facts and on educating the viewer.  However, what captures the average viewer’s attention and keeps it is a story (and its underlying dramatic question).  Will the researchers figure out how to collect their samples from an active volcano?  Which scientific team will sequence the human genome first?  How will the scientists navigate a wild river and reach their remote field site with their delicate instruments intact? What motivates a scientist to endure heat, biting insects, and muck to study wetlands?  Why should I care about climate change?

Those are all obvious dramatic questions, but can often lead to artificial conflicts or exaggerated challenges designed to imbue an otherwise dull story with drama.  The viewer is not fooled by such blatant stratagems. So the videographer must take care in selecting and incorporating a dramatic question into a movie project.  It’s possible to be more clever about this and create a video with a dramatic question that directly relates to the science, rather than to peripheral issues.  Here is an example in which the dramatic question focuses on the science topic and is even used as the title of the video:

It’s possible to pose a dramatic question about nature, which is not answered or only partially answered because the research is not complete or it’s a difficult question to answer.  The videographer has the opportunity to use such an instance to teach something about how science works and about how answers change over time as more information is uncovered.  An effective dramatic question is perhaps asked by a non-scientist, stimulating the viewer’s curiosity, and then answered by an expert who proceeds to conduct an experiment designed to answer that specific question because no-one thought to ask the question before.  Here is an example of an excellent video in which the dramatic question is about a phenomenon observed by an average person: why do some millipedes glow in the dark?

You notice that both of these examples involve an amazing visual display.  What if your topic is not so visual or not so amazing to the non-scientist?  I think the answer is that you just need to work a bit harder to show how amazing your topic is and to frame it as a dramatic question.

Don’t Be Afraid To Have Fun With Your Videos

As I’ve tried to emphasize in previous posts, scientists need to lighten up a bit when communicating science. I’m certainly guilty of being too stiff and cerebral in interviews and in my own videos. The character of Mr. Spock on Star Trek epitomizes the public’s view of the logical, emotionless scientist; Spock was always being criticized by Bones, the ship’s doctor for his Vulcan nature:

Like Spock, I’m probably not going to be able to go against my nature, but can modify how I say things on camera so that I don’t sound so much like an egghead.

As scientists, we also make the mistake of assuming that the general public will be impressed by facts, facts, and more facts. When scientists approach a video project, our inclination is to present the facts in a straightforward and, yes, logical manner. It’s drummed into us throughout our training to follow set guidelines for our research and strict formats for our science articles. So it’s difficult to break out of these molds and be creative in presenting science information. We also shy away from anything that might seem like fun for fear of being thought frivolous or, worse, ignorant. However, by not being creative and frivolous, we lose a lot of potential viewers.

Before I go any further, take a look at this video that is focused on beach litter:

Now, there are lots of videos out there about beach litter put out by various environmental organizations….and they are mostly deadly dull…. but this one gets the message across in a clever and entertaining way. And I’m guessing it was fun to make. This approach is just one way to be creative about communicating a message or educating the public about an important environmental topic. Humor is very effective. Other approaches, such as stimulating the viewer’s curiosity about how something (a field expedition, a lab experiment) will turn out also works.

I’ll discuss some of these methods in coming posts.

Don’t Be So Serious with Your Science Videos

Scientists are supposed to be serious…and most of us live up to this expectation.  However, this trait can be quite detracting and frustrating to non-scientists, unless it’s meant to be humorous as in this clip from Ferris Bueller’s Day Off:

You might succeed in using such humor, making fun of an egghead speaking on camera.  But in general, this humorous approach is already a cliche, and it would take a really fresh twist to succeed.

In general, a talking head who is pompous or pedantic is going to turn off viewers. The viewer does not want to be lectured to (they got enough of that in school). As a scientist videographer, you will have two choices of (professional) talking heads in your projects:  you or your colleagues.  Both of you likely suffer from the “stuck in their heads” syndrome.  We think too much instead of just doing or saying what comes naturally to other people.  A book called, “Don’t Be Such a Scientist”, by Randy Olson addresses this very issue as it relates to science communication.  Olson has advice for scientist communicators, spelled out in his book chapters:

1. Don’t be so cerebral

2. Don’t be so literal-minded

3. Don’t be such a poor story-teller

4. Don’t be so unlikeable

Olson makes the case in his book that although accuracy is important, it’s even more important to grab the public’s attention so that the science message is heard.  I agree, but that’s easier said than done.

Many of my scientific colleagues are, to put it bluntly, boring on camera (and I include myself in this group).  We are, to borrow Olson’s list:  too cerebral, too literal-minded, poor story-tellers, and generally unlikeable.  It’s rare to see a scientist whose personality attracts rather than repels viewers.  Think Neil deGrasse Tyson, astrophysicist and science communicator:

We can’t all be like Tyson, but we can strive to “get out of our heads” so that we can communicate like the average person.  It’s impossible to change someone’s natural demeanor (and you don’t want to try).  However, we can select our interview subjects carefully so that the message we want to convey is heard and accepted.  If you are uncomfortable on camera and this discomfort is contributing to a poor demeanor, then practice giving interviews.

I was absolutely terrible the first time I was interviewed on camera (at least it felt that way).  The interviewer kept restating my answers in a much clearer and appealing way without scientific jargon and asking, “Is this what you meant?” Although I felt like an idiot at the time, I learned a lot from the experience.  More recently, what has helped me improve my performance in front of a camera is interviewing other scientists.  Seeing how other scientists perform….which ones shine on camera and which ones are dreadful…is an eye-opening experience.  I highly recommend doing a few interviews with your colleagues and then reviewing the footage.  If I were going to teach a science videography course or workshop, that would be one of the exercises.

How to Create Animations for your Science Videos with PowerPoint: Part Two

This is the second part of the tutorial on using PowerPoint to create simple effective animations for your movie projects. In part one, I covered how to set up your slides in sequence to create the animation. In part two, I finish up by showing how to export your project as a movie and then import it into your movie-editing program (for best viewing, select the HD version and full-screen options (see menu bar at bottom of player window).

Animations can greatly enhance your videos, providing a way to better visualize concepts or techniques. In future tutorials, I’ll show how to use more sophisticated applications to create animations that will make your videos look more professional.