How Long Does It Take to Make a Video?

This question is the one I get most often from science professionals attending my workshops and seminars. Everyone is busy. I get it. You get it. People want to know how much of their valuable time is going to be diverted toward an activity that is not going to contribute to their h-index.

So I’m going to try to answer that question in this blog post.

The most honest answer is: it depends. People vary wildly in their abilities to craft a compelling story, to visualize how to tell it, and to operate the recording equipment and editing software. The actual amount of time you will spend will depend on your skill level at using the equipment and software required for making a video. If you’ve never used movie editing software, then it’s going to take you longer to edit your clips compared to someone who’s played around with iMovie, for example. The same goes for designing and filming.

Consequently, I’m going to give some ballpark estimates based on a relatively inexperienced person–someone who typically takes a video-making workshop.

In my workshops, I’ve found that people can generally design their video (overall story and how to tell it) in an hour or so, especially if they are given a template to follow. Filming can take a couple of hours or days, depending on your topic, length of the planned video, and where you need to film. Workshop participants, working in pairs and using smartphones or tablets, were able to film the main segments of their 3-minute video in two to three hours. Another hour might be spent shooting B-roll or searching the Internet for video clips, animations, photographs, maps, and illustrations to augment the filmed segments. After a brief tutorial, editing might take another couple of hours.

Based on these estimates, the total time required to produce a rough cut is six to seven hours. Another couple of hours will likely be needed to polish or reshoot problematic clips. In other words, plan on spending (at a minimum) the equivalent of an entire day making your video.

As you gain experience, though, you will find that you can use your phone to shoot and edit a video on the fly. For example, when you are conducting fieldwork, it’s easy to shoot brief clips that are immediately imported into an editing program such as iMovie. While waiting for your electrodes to equilibrate or for sample bottles to incubate, you can do some trimming and editing of those clips. I can take this approach while on a field trip and have one or more videos ready to upload by the end of the day. See this example that I filmed with my iPhone:

Before I went to the site, I spent some time searching the Internet for information about the mangroves growing in the region. Armed with that information, I began planning the video (in my head) during the drive to where this mangrove stand was located on Yakushima. I spent around two hours at the site filming various aspects of the mangrove stand and jotting down notes about some of the plant characteristics I observed. I started editing this video on my phone with the iMovie app for iOS while I was on site and could retake any clips that needed improvement (I had to reshoot the segment in which I spoke several times).

As the story began to crystalize, I walked around shooting B-roll to illustrate important points to be made. By the time I was ready to leave, I had a rough cut of the video finished and ready to polish. After returning to my hotel room, I added voice-over to the video and also some images of maps and other items that I had to download or modify using my computer. Making this video was fun and informative and made the excursion to see this unique stand more memorable.

How long does it take to make a video? For me, the answer doesn’t really matter. What’s important is that I’ve made a video and, in the process, learned something new.

Muddy Mangrove Movie-Fest

mangrovemud_klmckeeIt was the third day of the conference, and we had just finished a walking tour of a local mangrove forest and shoreline at Ludmilla Bay, north of Darwin in the Northern Territory, Australia. Everyone was hot, thirsty, and sweaty as we filed into the air-conditioned auditorium at Charles Darwin University for the “Muddy Mangrove Movie-Fest”. We were about to be treated to a viewing of several videos made by researchers, conservation groups, and independent filmmakers–all focused on the topic of the conference–mangroves.

Earlier this month, I had traveled back to Australia to attend another meeting of the Australian Mangrove and Saltmarsh Network. The previous year I had been invited by the organizers to give one of the keynote talks. My presentation was titled “Communication Tools and Strategies for the 21st Century Scientist” in which I encouraged students and scientists to consider using the new media (blogs, video, social media, etc.) to share their work more widely within and beyond the scientific community.

Apparently, the attendees of the 2015 AMSN conference liked my message because they started planning a movie-fest for the next meeting that I was now attending in Darwin. The Muddy Mangrove Movie-Fest was opened by acknowledging me as the inspiration for it. I was thrilled to have been able to motivate others to go out and make videos about mangroves and mangrove research. Even better was to be present for the official screening of those videos at the 2016 AMSN conference.

IMG_4079

You can see the list of videos that were screened in the image at left. Not all of the Muddy Mangrove Movie-Fest videos are online, but some are. In fact, I had already seen and highlighted on this blog (Use Video to Share Your Dissertation) one of these videos (not knowing that it was to be featured at the Darwin conference).

I met the Ph.D. student, Mike Miloshis, featured in that video (Rise of the Mary River) at the Darwin conference earlier in the week. He came up and introduced himself and asked, “Aren’t you the Scientist Videographer?” I laughed and said that I certainly was. Then it hit me that I was talking to the student in the video I had critiqued on this blog.

As the lights dimmed and the first video began, I thought, “What a great idea–having a session at a science conference featuring videos created by attendees about their research.” Some of the videos were informative, some were inspirational, and some were funny. But the audience seemed to enjoy all of them. I know I did.

Here are the Muddy Mangrove Movie-Fest videos that are online (if anyone knows where the others are posted, please let me know):

Rise of the Mary River

Reducing the Risk of Disasters through Nature-Based Solutions: Mangroves

How to Get a Great Sediment Core

The Sinking State of Mangroves

Coastal Habitat Archive and Monitoring Program (CHAMP)

Try Tweeting A 30-Second Video of Your Science

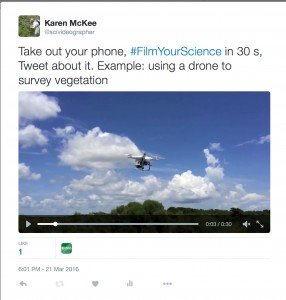
I recently posted this Tweet:filmyourscience

The idea is to encourage scientists to film some aspect of their research and share it through social media. Many scientists now have a smartphone that will shoot video. The incredible quality of phone cameras and ease of filming with them allow anyone to capture footage with minimal fuss. At the same time, some scientists and especially students are increasingly using Twitter to interact and share information.

I think that Twitter, which allows brief video clips (maximum length = 30 sec) along with a text message, is perfect for quickly sharing something you’re doing in the lab or an interesting observation you’ve made in the field. Using a hashtag (#FilmYourScience) helps identify tweets related to the topic.

I think such an effort has many benefits…for scientists as well as the scientific community.

  • Filming and sharing 30-second Tweets is a great way to learn how to shoot a video as well as to use social media to share science.
  • By learning to film and share videos of research, scientists will become more comfortable with the medium and see how effective video can be.
  • Sharing brief insights or observations via Twitter is an easy way to engage the public.
  • Showing what scientists do and where they work will help dispel some of the stereotypes about our profession.
  • Tweeting brief videos is a great way for a young researcher to increase their visibility and perhaps to find future collaborators.
  • Seeing and hearing about the various interesting things scientists do and where they work will encourage students to consider science as a career.

Here are brief instructions how to go about recording a video on a smartphone for a Tweet:

  1. Tap the Tweet icon to open a new message.
  2. Tap the camera icon.
  3. Tap the video icon, which will access the video camera.
  4. Record a video by holding down the record button. More clips can be added by pressing again. Record up to 30 seconds (you’ll get a warning when this limit is reached).
  5. Review clip by tapping it. Trim by dragging end bars. Reorder clips by dragging.
  6. Tap Done when finished.
  7. Add a text message to explain your video.
  8. Tap Tweet to share.

You can also import a previously recorded video from your device’s media library. These can be trimmed to 30 seconds in Twitter. To stop the video from autoplaying in your Twitter timeline, go to Settings>Data>Video>Video autoplay and change the setting.

Finally, here is a video tutorial showing how to attach a video to a Tweet (direct link):

One More Freebie

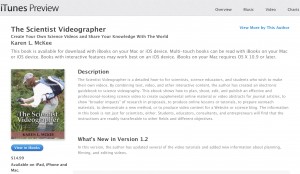
Since I’ve made free copies of my book, The Scientist Videographer, available at Smashwords, I’ve decided to also offer free copies of the original (interactive) version of my book, (readable on iPad, iPhone, & Mac) in exchange for a review.screenshot_book_itunes

Here’s how to get yours: email me at thescientistvideographer@gmail.com and indicate that you would like to review my book in the iTunes Store. I will then send you the promo code, and you will be able to download the book for free. There is a limited number of these promos, and they are going fast.

Don’t have an Apple device? Consider using this offer to gift my book to a colleague or student who has an iPad, iPhone, or Mac and who has expressed an interest in making videos.

Why am I giving my book away for free?

Well, mainly because I’m not looking to make money with it. My primary motivation in publishing the book was to encourage and promote better communication of science by science professionals. All of the information and tutorials (now numbering more than 100) I’ve created since 2012 are available for free. I wanted to make that information available in a more organized and focused way, so I pulled it together in this book.

I self-published The Scientist Videographer via iBooks Author (which, by the way, is an awesome authoring platform). I’ve depended on word of mouth and social media to get the word out. Book reviews also are really important to encourage people to read my book and to try using video as a communication tool.

If you are one of the many visitors to this blog (about 400 per day) who have benefitted from the information and free tutorials you found here or on my YouTube channel, please help me spread the word by writing a review and telling your colleagues and friends about my offer.

Free Copies of The Scientist Videographer eBook Available at Smashwords

In addition to Apple’s iBooks and Amazon’s Kindle, I’ve just published a copy of The Scientist Videographer at Smashwords. At the latter, you have the option to download the book as an ePub, pdf, Mobi, or txt file or to read it online.

For a limited time, I’m offering copies of the book at Smashwords free to anyone who agrees to review the book at any of the above distributors. All you have to do is send me a note that you agree (thescientistvideographer@gmail.com), and I will give you a promotional code to use when you check out. Already have a copy of my book? Consider writing a review and use the promotional code to give the book as a gift to a friend or colleague. This offer ends April 21, 2016.

Smashwords screenshot